

How To Remove Braces In Photoshop Cc 2017
Learn how to remove acne and other minor skin blemishes from a portrait, leaving good for you looking pare in its identify, using the Spot Healing Brush in Photoshop! The Spot Healing Brush tin can remove or repair all kinds of small imperfections in a photo, but here we'll focus on how to use it to retouch skin.
Why The Spot Healing Brush Is Perfect For Removing Blemishes
Photoshop's Spot Healing Brush is basically a texture replacement tool. It takes damaged or unwanted texture from one area and replaces it with good texture from the surrounding expanse. The expert texture is then blended with the trouble area's original tone and color to "heal" the epitome with seamless results.
The Spot Healing Brush is similar to its big brother, the standard Healing Brush. Merely while the Healing Brush makes us choose the skilful texture ourselves, the Spot Healing Castor chooses texture all on its own, and that makes information technology much faster to use. When retouching skin, nosotros but click on a blemish with the Spot Healing Brush, and like magic, the blemish is gone! Let's come across how it works. I'll exist using Photoshop CC simply this tutorial is fully uniform with Photoshop CS6.
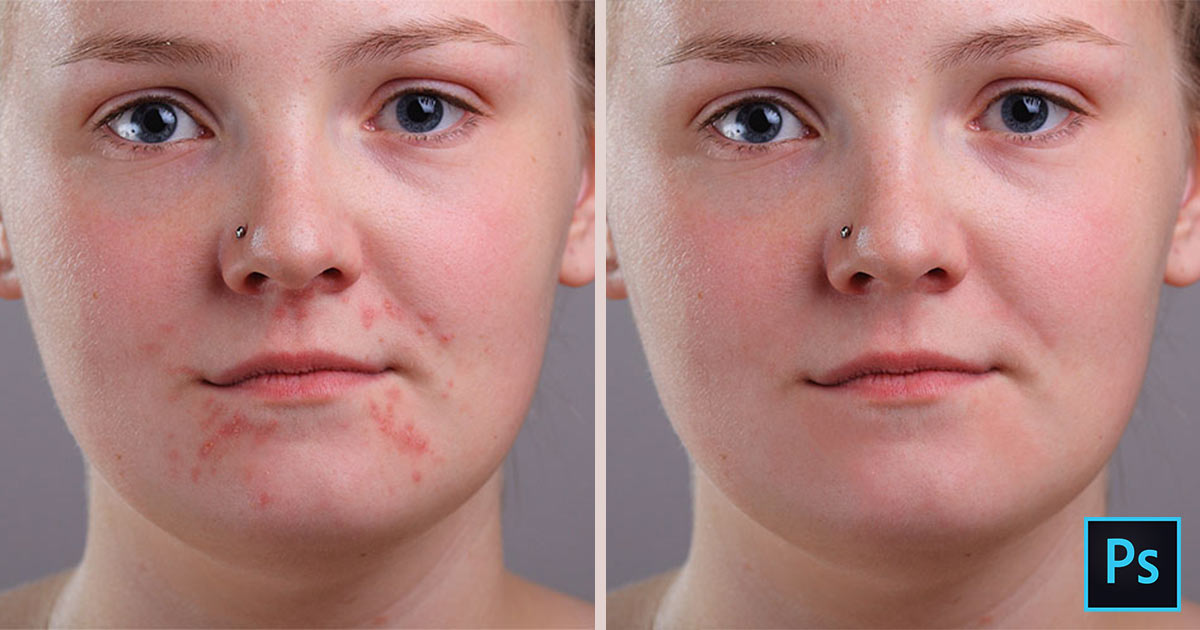
To follow along, you tin use whatever image where the person's skin could use some quick retouching. I'll utilize this photo and then we can come across how the Spot Healing Brush can exist used to quickly remove some distracting pimples from the immature adult female'southward confront (acne photo from Shutterstock):

A teenager with typical teenage pare problems.
Here's what the same photo will look like later retouching her pare:
The concluding result.
This tutorial is role of our Portrait Retouching collection. Let's get started!
How To Remove Skin Blemishes In Photoshop
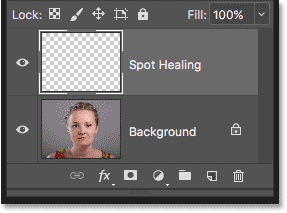
Step 1: Add A New Blank Layer
With the photo newly-opened in Photoshop, the Layers panel shows the image on the Background layer:

The original photo on the Background layer.
To proceed your retouching work separate from the original prototype, add a new layer to a higher place the epitome past pressing and property the Alt (Win) / Selection (Mac) central on your keyboard and clicking the Add New Layer icon:
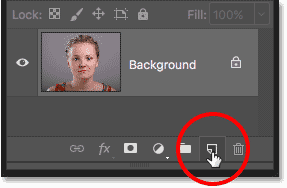
Adding a new layer.
In the New Layer dialog box, name the layer "Spot Healing" and then click OK:
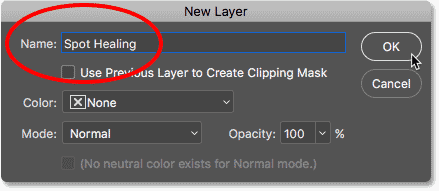
Naming the layer in the New Layer dialog box.
The new "Spot Healing" layer appears above the Background layer:
The retouching work will now be separate from the original photo.
Stride 2: Select The Spot Healing Brush
Select the Spot Healing Brush from the Toolbar:

Choosing the Spot Healing Brush.
Step 3: Select The "Sample All Layers" Choice
With the Spot Healing Brush selected, plow on the Sample All Layers option in the Options Bar. This lets the Spot Healing Castor sample texture non just from the currently-selected layer (the "Spot Healing" layer, which is bare), simply also from the paradigm beneath:

The "Sample All Layers" pick.
Step 4: Select "Content-Aware"
Still in the Options Bar, make sure Type is set to Content-Aware. This allows Photoshop to make more intelligent decisions when choosing good replacement texture:
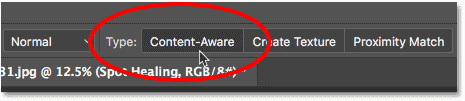
"Content-Enlightened" should be selected by default.
Step 5: Click On The Skin Blemishes To Heal Them
Click on pimples and other minor skin blemishes with the Spot Healing Brush to speedily heal them. For best results, proceed your brush slightly larger than the blemish. To change your brush size from the keyboard, printing the left subclass fundamental ( [ ) to make the brush smaller or the right bracket fundamental ( ] ) to make information technology larger.
Here, I'm positioning my brush over 1 of the pimples, and I've resized my brush and then that the cursor (the black circular outline) is merely a bit larger than the pimple itself:
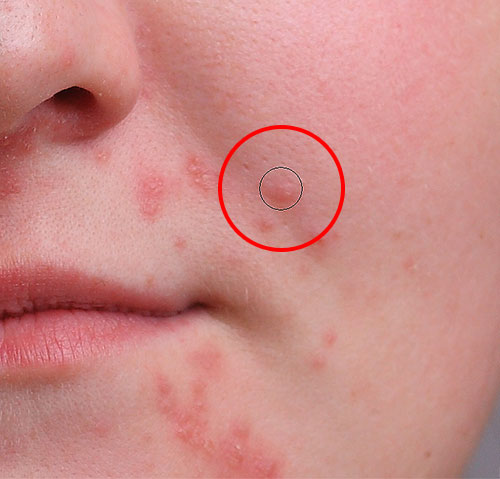
Moving the Spot Healing Brush over a blemish.
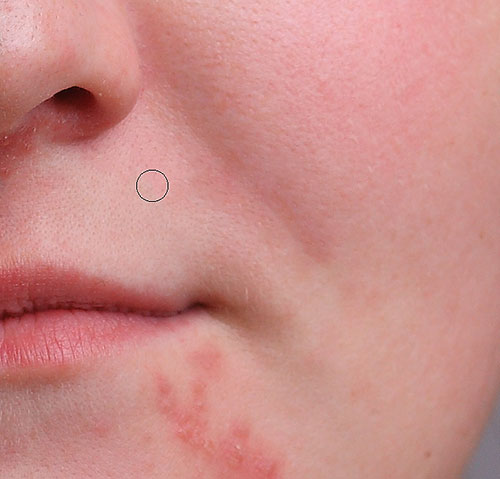
I'll click on the pimple with the Spot Healing Castor, and instantly, it's gone! Photoshop replaced it with good skin texture from the surrounding area:

Clicking to remove the blemish and heal the area.
How To Fix Mistakes
If Photoshop makes a error and the blotch isn't gone afterward the offset endeavor, undo your click by pressing Ctrl+Z (Win) / Command+Z (Mac) on your keyboard. Resize your castor if needed, and so click on the aforementioned spot to attempt again. Each time you click, you'll get a different result.
I'll proceed immigration upwards other pimples in the area by moving my brush over them, adjusting its size with the left and right bracket keys, and clicking. Her peel is already looking meliorate:
More than pimples have been cleared upward with just a few clicks of the mouse.
Retouching Larger Areas With The Spot Healing Brush
Let'southward motility down to her chin where we see some larger bug:
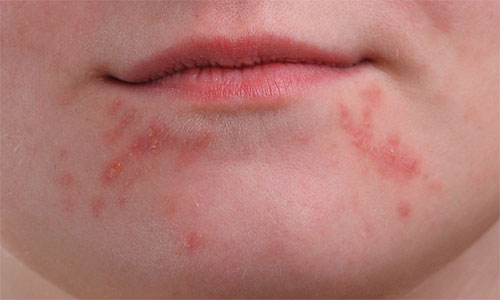
Large clusters of pimples tin be a chip more than of a challenge.
To clear upward more hard areas like this, tackle the easier problems first. I'll start by clicking on the small, isolated pimples with the Spot Healing Brush to heal them and get them out of the manner:
Heal minor areas before moving on to larger ones.
Then, rather than trying to set a large expanse all at one time with a super broad brush and a single click, approach it in smaller sections, beginning from the outside and making your way inward. Along with clicking, you can also click and drag the Spot Healing Brush in brusk strokes. As you drag, your brush stroke volition appear blackness:
Dragging a brusk brush stroke beyond the area.
Release your mouse push button and Photoshop heals the area with surrounding texture:
Releasing the brush to let the Spot Healing Brush practise its thing.
I'll continue clicking and dragging over the area i minor section at a time, going dorsum over any trouble spots every bit needed with additional clicks. After a short few minutes worth of effort, the Spot Healing Brush did a pretty good task:
The surface area on the right is now looking a lot improve.
I'll exercise the same thing for the expanse on the other side of her chin, using a small brush and a series of clicks and short brush strokes to tackle the area a little at a time. And here's the upshot:
Her chin is at present pimple-free thanks to the Spot Healing Brush.
Clearing Upwardly The Remaining Blemishes
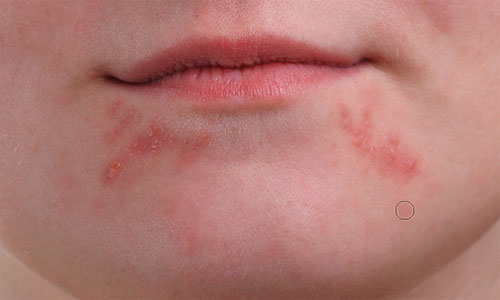
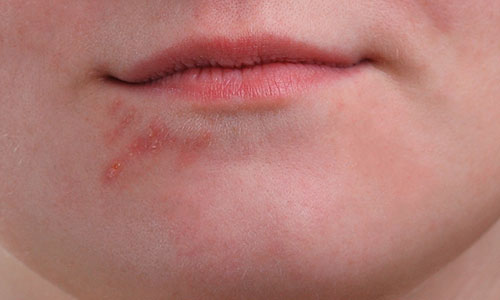
There'southward i cluster of pimples remaining, and it's straight nether her olfactory organ:
A few more pimples left to remove.
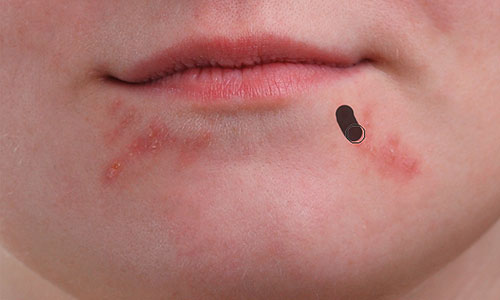
Once more, I'll start by clicking on the smaller, isolated pimples to heal them, keeping my brush simply slightly larger than the pimple itself:

Healing the smaller areas starting time.
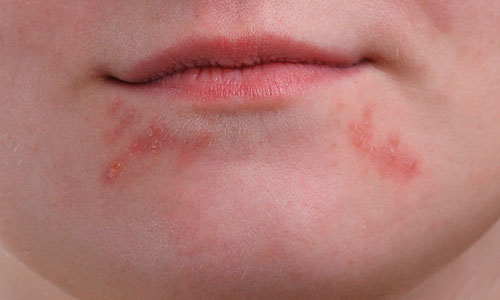
Then I'll utilise a combination of clicking and dragging with a minor castor to heal the remaining area:

Clearing upwards the final of the pimples.
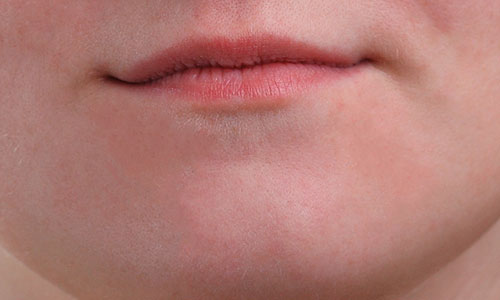
The area is now pimple-gratuitous, with healthy skin texture in its identify:
The remaining blemishes take been removed.
The Spot Healing Brush Blend Modes
When retouching peel with the Spot Healing Brush, y'all'll often go ameliorate results by changing the blend mode of the brush from Normal (the default setting) to Lighten. The Blend Mode selection is found in the Options Bar:
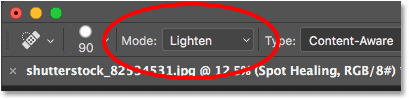
The Alloy Style option for the Spot Healing Brush.
With the blend mode set to Lighten, Photoshop will only replace pixels that are darker than the practiced texture. Since pimples and other skin blemishes are normally darker than normal skin tone, only the pimple or blemish itself gets replaced, leaving more of the original skin texture surrounding it intact. If a blemish is lighter than the normal skin tone, endeavour the Darken mode instead.
To speedily switch between alloy modes for the Spot Healing Brush, printing and concord the Shift primal on your keyboard and printing the + or - keys.
Before And Subsequently Comparison
To compare your retouching work with the original image, toggle the "Spot Healing" layer on and off past clicking its visibility icon in the Layers panel:
The visibility icon for the "Spot Healing" layer.
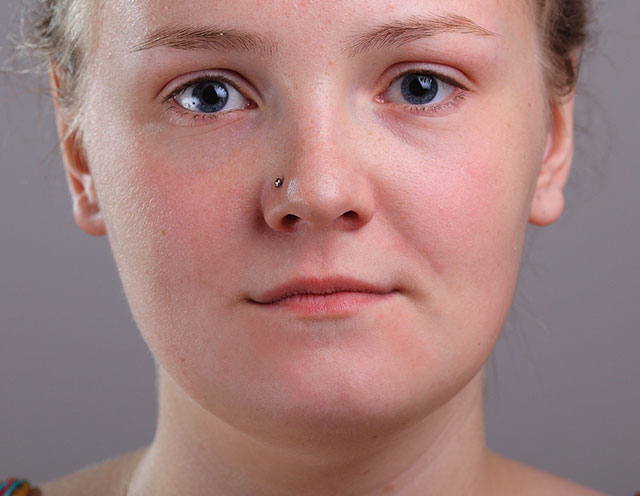
Click it once to turn the "Spot Healing" layer off and view the original, unedited version:
The original image.
Click it once again to plough the "Spot Healing" layer back on and view your image with the skin blemishes removed:
The final consequence.
And in that location we have it! That's how to remove acne and other pocket-size pare blemishes with the Spot Healing Brush in Photoshop! Now that you know how the Spot Healing Brush works, take your skills to the next level past learning how to smooth skin in a portrait, or how to reduce the advent of wrinkles! You'll notice fifty-fifty more tutorials in our Photo Retouching section!
Source: https://www.photoshopessentials.com/photo-editing/spot-healing-brush/
Posted by: engellils1998.blogspot.com
0 Response to "How To Remove Braces In Photoshop Cc 2017"
Post a Comment